 |
 |
 |
 |


Follow The InnKeeper on:


Dress Dummy Pictures
Since making Baroness, I have fallen in love with liquid latex costuming. But it's really difficult to paint oneself with latex, so I usually have to rely on an assistant who does all the painting while I stand there, immobile and cold, for hours while the latex dries. So I decided I needed a dressmaker's form, also known as a dress dummy, who could stand there for me. I could use my store-bought dress form, but it doesn't have legs and it doesn't match my measurements exactly. It's a rough estimate, but when making skin-tight costumes that need to fit like a gove, I really needed to be able to fit them on my body, not an approximate human form roughly my size.
So I decided to make a custom dress dummy. I tried the Duct Tape Dummy, twice, in fact. But they just didn't hold my shape well. They're a little better than the genric store-bought dummies and I highly recommend one for the costumer on a budget. They do get your proportions a lot closer than the generic dummies, but they just don't get all the details and contours that are so important when making skin-tight costumes. Both of my attempts collapsed before I had a chance to stuff them, and they just didn't accurately reflect the dips around the curves, like the valley between the breasts and under the buttocks.
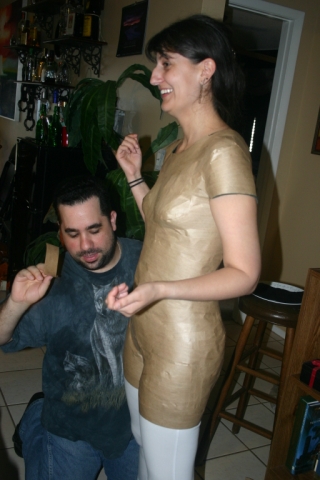
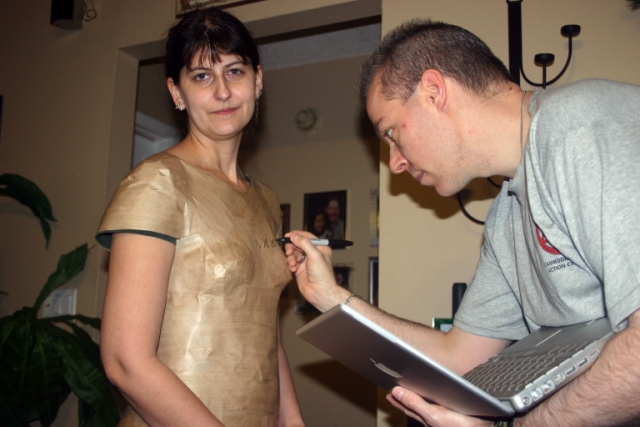
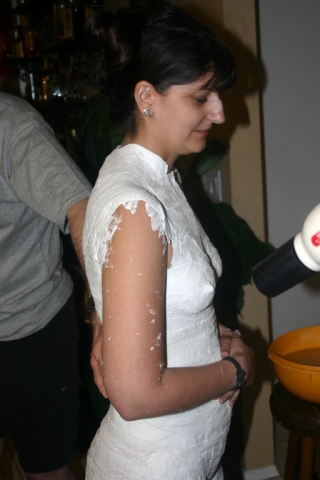
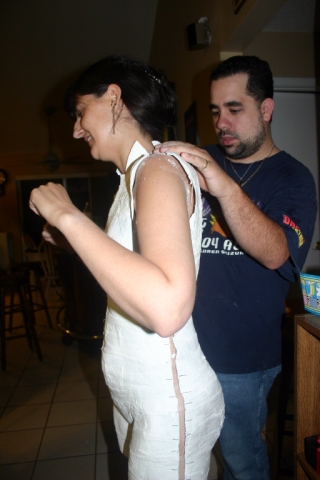
So I decided to go with a Paper Tape Dummy, which is reminiscent of the old Victorian paper-mache-like dummies. This goes on wet, and dries to a rigid cast in much greater detail, and it maintains its shape even after it is pulled from the body, put back together, thrown in the car, tossed in the corner of the bedroom, and sat there for several days until you get around to stuffing it ... just for example.
But, since I had never made one before, as a backup, I decided to make a Plaster Dummy too. I made one years ago to mold my copper Leia costume. I chose a plaster one back then because I knew I would be bending and shaping copper sheets and tubes and I wanted a very rigid form that could withstand that kind of pressure. I don't think I need that level of rigidity for the latex, but I knew the plaster method would work when I wasn't sure about the paper tape method. Plus, I have the option of filling the plaster mold with something else, like latex or insulation foam, and peeling the plaster away to make a solid-but-not-plaster dummy that would be extremely accurate, down to the shapes of the nipples, if I wanted.
So I made both, and here are the instructions.
Thanks to Tacit for all the pictures and the binding me in tape and plaster, then cutting me out, Zensidhe & Datan0de for binding me in tape and plaster, then cutting me out, Femetal for cutting the strips, looking up the instructions online, and letting me borrow her Flexi-8 hair clips to try out the different sizes before I bought some and to keep my hair out of the sticky, gummy, plastery mess (for those who are interested, I'm wearing the Medium size and it held my hair up all day!), and to Zensidhe & Janet for hosting the party!
Please do not steal these images. If you wish to copy these images, show these images on your own website or link to mine, please ask permission first.
|
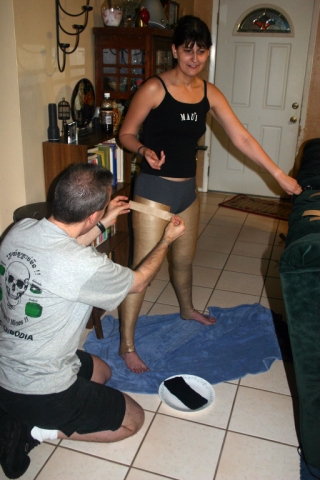
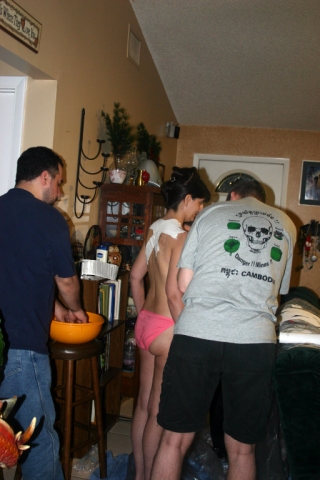
Paper Tape Dummy
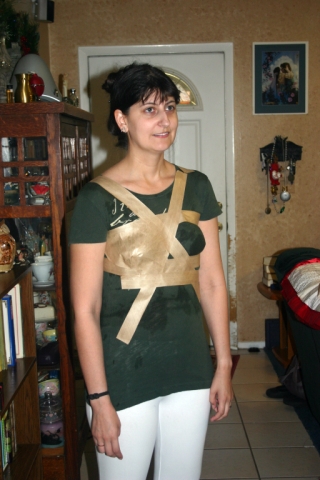
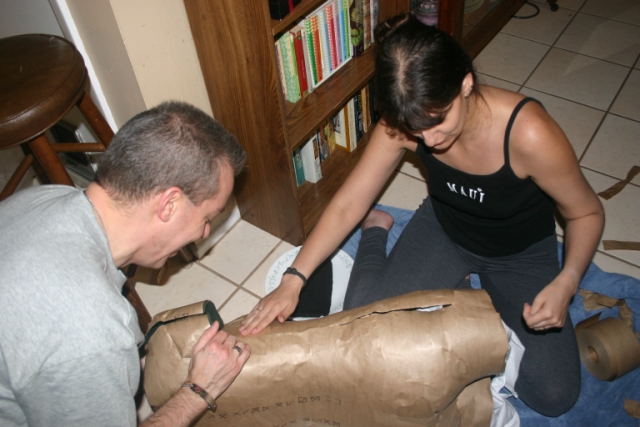
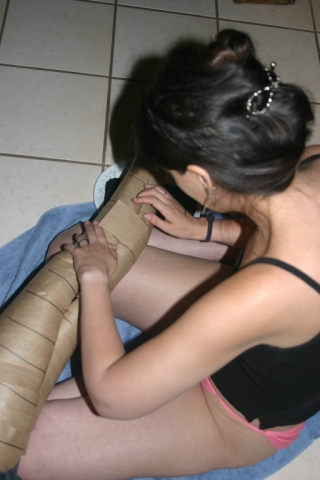
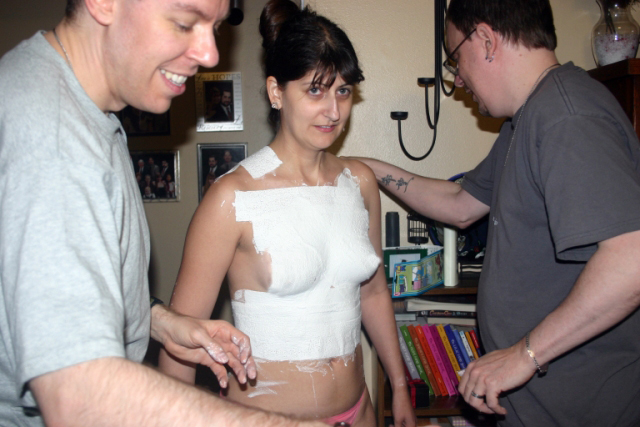
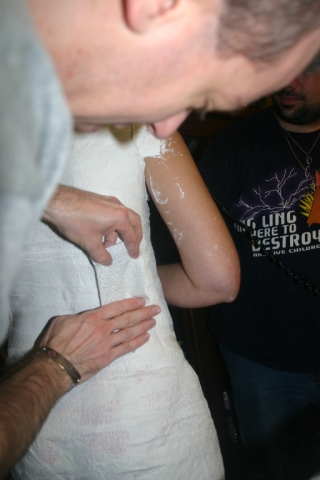
1) Have someone pre-cut strips of different lengths (the person being taped up can help with this if they're careful). Soak a washrag with water and fold it, leaving it on a water-safe surface, like a plate or bowl. Then press the gummed-side of a strip of paper tape into the wet towel. The paper tape is quite a strict balancing act to get the right amount of wetness. It may take a few tries to get the right amount, and don't be afraid to peel off your first attempts if they don't work quite right. Too much water and the gum will wash off and make the tape curl and turn into a gummy mess that still won't stick, but not enough water and, again, the tape won't stick. 2) Start with a long strip just underneath and just above the breasts, pulled tight around the ribcage and the chest (but don't squish the breasts into an unnatural position - this isn't breast-binding bondage!). Then add long strips in a cross-your-heart fashion between the breasts to get that valley accurately. 3) We then used small, rectangle pieces cut diagonally and applied radially overlapped around the breasts with the points of the pieces overlapping at the nipple. Additional small pieces were added where necessary to cover gaps and strengthen the area with more layers. When applying a strip, press the center of the strip into the valley of the contour and smooth out towards the ends of the strip, letting the ends fall where they want to. Do not try and make the ends of the strip go anywhere in particular, if there are places that are left uncovered, just add another strip to that area afterwards. Do not start by pressing one end of the strip and smoothing out towards the other end - the curves and dips on the body almost always make the far end of the strip end up somewhere you weren't trying to make it go.
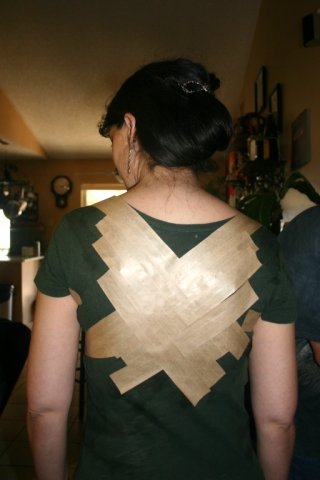
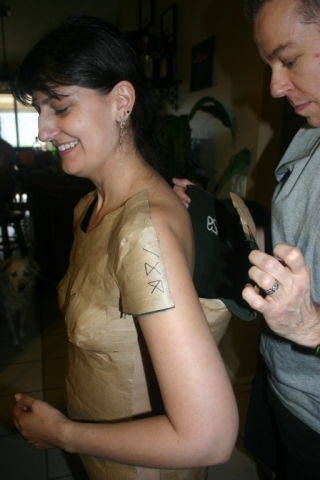
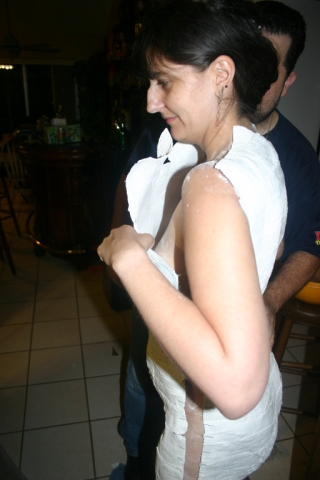
4) The back starts between the shoulderblades with short, crisscrossed pieces to preserve the contours of the back. Again, press the center of the strip into the hollow of the spine or under the shoulderblade and smooth outwards towards both ends, allowing the end of the strip to follow the curves wherever they want to go. You can fill in the gaps with more tape.
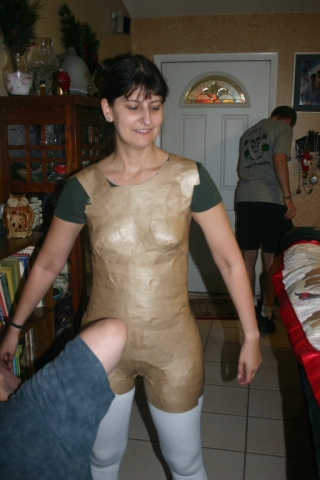
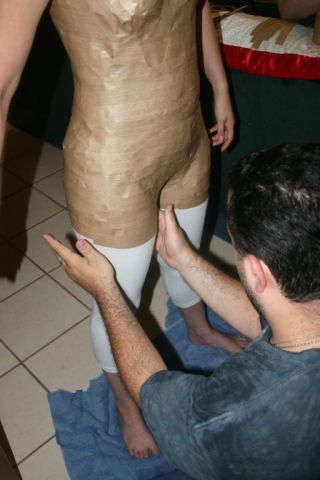
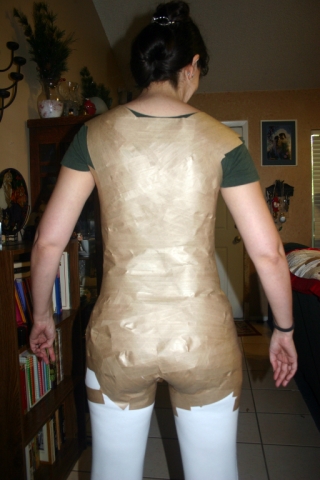
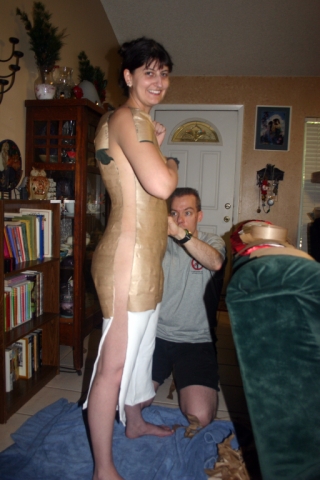
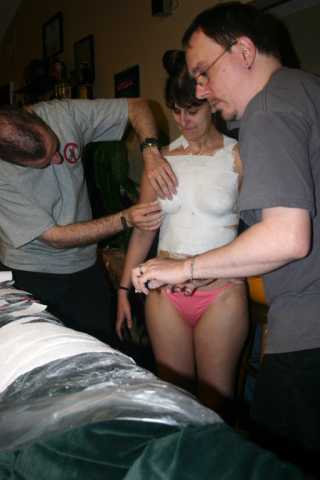
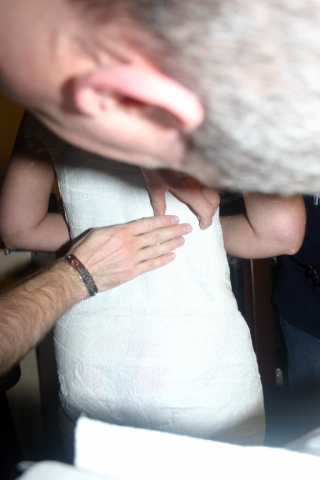
5) The rest of the process is considerably easier. Wrap lots of pieces of tape horizontally around the body, overlapping each piece and completely covering the torso from neckline to hips. Add a few strips over the shoulders like overall straps. Stop at the edges of the shoulders (roughly where the t-shirt sleeve seam is) unless you plan to make arms to attach to your dummy. You can stop at the hips and make a flat-bottomed dummy like most dress forms, or you can continue a little lower and get the tops of each legs, like I did. My costumes include things like superhero leotards, and custom boots, so it was important to me to get the hips, crotch and legs into the dummy for accurate costuming. We cut the strips in half, lengthwise, to fit into the crotch area. I tried to stand with my legs just far enough that the dummy could be made, but not so far that the leg pieces, when they were attached later, were splayed out and the dummy couldn't stand up.
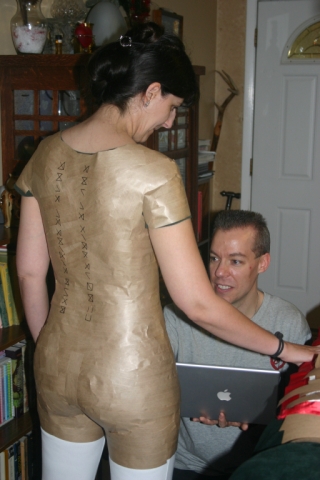
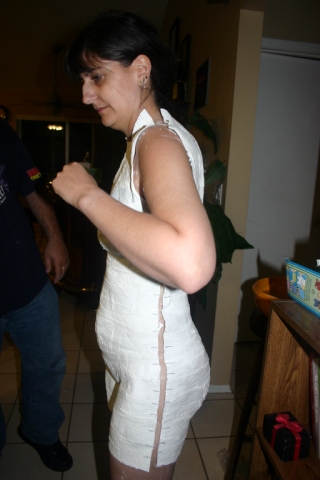
I chose to let my friends decorate my dummy, but that's completely optional. For the record, the symbols are from the font used in the game Solvalou and they translate to the following: (on the arm) arm; (on the chest) breasts; (on the back) This is [Joreth]'s body she is damn sexy; (on the stomach) [waiting for translation]; (above the mons) pussy.
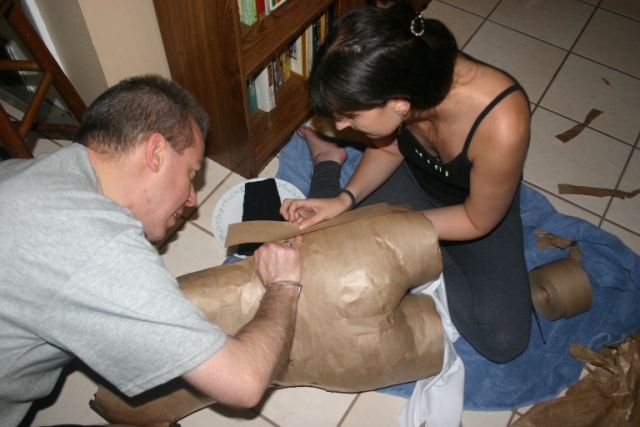
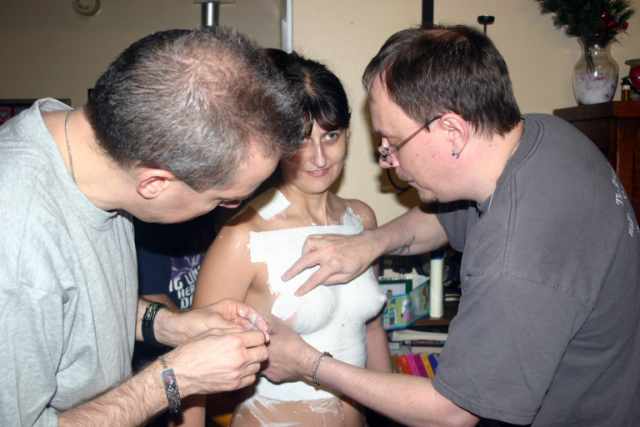
6) The next step is to remove the now-rigid form from the person once it's dry. First make a series of hash marks along the future seam of where you will be cutting. This allows you to line them up again for reassembly. If your dummy does not have legs, and you plan to make it a flat bottom, only a single seam will be required, straight up the back. But if you made legs or stumps like I did, you will need to make two cuts, one up each side.
7) Next, line up the two halves (which are probably still joined at the crotch), and paper-tape the seams back together. I recommend, at this point, inserting a hanger before taping the two halves together. It's not shown in the pictures because I forgot to do it until later, and it was a chore trying to get that hanger in once it was taped back together. I nearly cut it open again just to do it. The hanger allows you to hang the torso from a clothing rack to work or for storage, so you don't have to worry about building a stand or having that stand interfere with the costume you're trying to fit on the dummy. You might want to use a hanger that you can cut the tips of the arms off, so that the shoulder bars still run the length of the shoulders and hold the dummy, but the tips won't poke through the armholes, possibly messing up the measurements or lines of the shoulder joint in your clothing. Anyway, tape up the seams using small pieces of paper tape in several places along the side as tabs to hold the two halves together, then add several long strips right up the center of the seam. You may want to make two or three layers, overlapping the edges of the first vertical strip on either side for security and stability.
I then cut off the extraneous tape around the arms to make a flat armhole that I can eventually seal shut with paper tape after I've filled it.
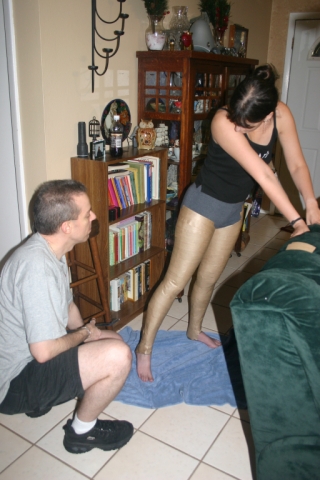
Next, time for the legs!
Repeat steps 1-7 for the legs and scroll down for step 8:
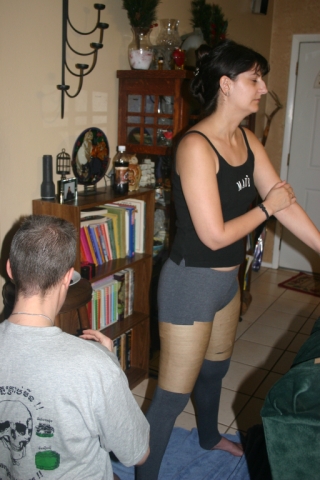
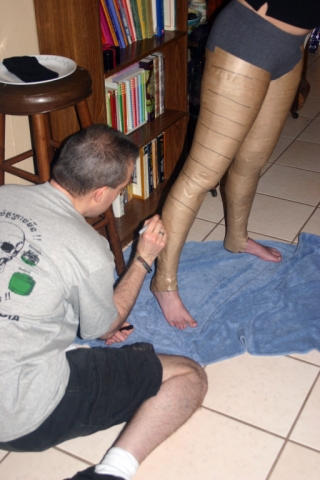
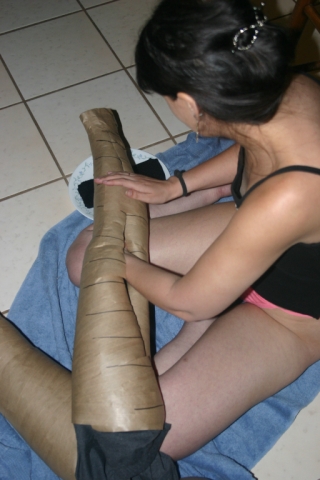
For the legs, I wore the long leggins and stretched the fabric down under my heel. Tape was added over my ankles all the way to the floor so that the finished dummy could rest on the floor and be my exact height. The heel can be inserted into a pair of shoes, which are then inserted into tights to make latex boots, so I needed to be exact about the proper length of the leg. I'm thinking of getting a pair of shoe-stuffers, either just cardboard fillers that come inside new shoes, or buying a pair of plastic ones that are meant to be inserted into shoes to help keep their shape while in storage, to make it easier to attach the shoes to the legs when I make boots.
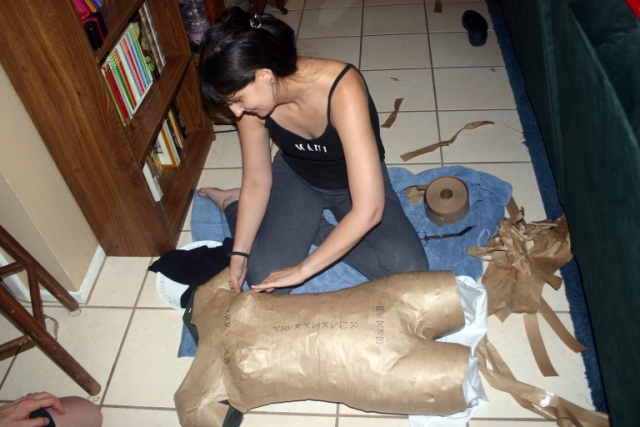
Again, mark hashmarks to line the halves back up again when it's time to put them back together. When it comes time to cut the legs off, you might want to have a pair of small, narrow-bladed scissors, in the event the paper tape was wrapped too tightly. Take great care with these, however, as the sharp point can pierce the leg when you try to insert it between the leg and the tape. Just like with the torso, a long, straight cut up the sides is the best way to get these off, but since these are two separate pieces, there will only be a single seam per leg. Just like putting it on, one person found it was easier to start at the top and cut down, the other person found it was easier to start at the ankle and cut up. I found no difference in the finished product.
Once again, line up the hashmarks on the seam and place paper tape tabs at strategic places along the legs. I found it worked best if there was a tab at each place where the leg either narrowed or swelled outwards, like the ankle, the knee, the rounded part of the calf, one or two tabs along the thigh, and the top of the thigh. Then add long, vertical strips along the seam, overlapping with second or third layers where necessary.
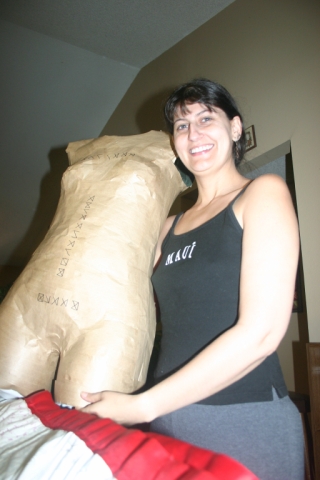
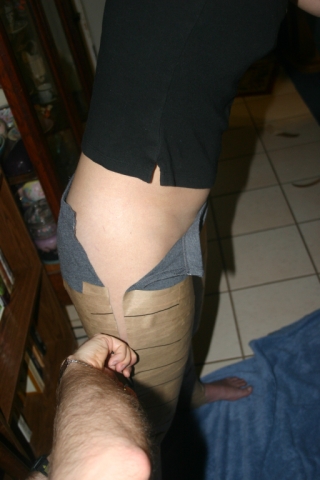
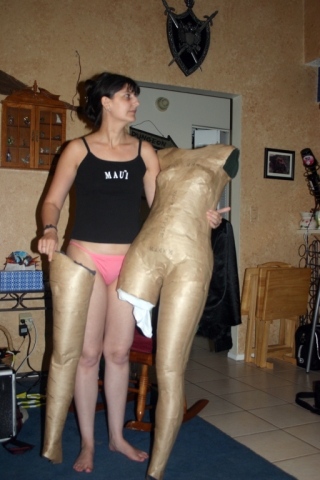
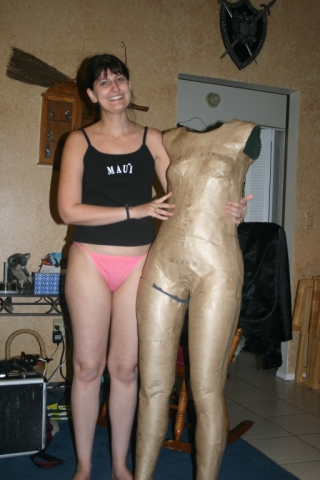
At this point, the waistband/crotch area of the leggings were making the legs effectively still one piece, so I separated them by cutting around the thighs at the top of the paper tape and removing the untaped portion of the leggings that covered the hips. This also gave me the opportunity to even out the tops of the legs to make a mostly-flat-but-slightly-angled top of the thigh and make sure they were the same length. The opening at the top of each leg quite beautifully slid over the stumps in the torso, making a full-sized me-shaped dummy.
I am leaving these legs intentionally separate pieces for ease of travel and storage. I plan to use either velcro, or gaff tape or pins to temporarily attach the legs to the torso while working. If I use Velcro, I will put a small strip of fuzzy around the stump of the thigh and a small strip of the scratchy side along the inside top of each leg and this will ensure that the legs get put on at the right place each time. If I use tape, I plan to use gaff tape, which I have already tested and found that it will hold securely under minimal stress but will also peel off again without damaging the paper tape underneath. I could use pins, but I think that's my least favorite option, since the holes will be permanent and I may have to do repair work in the future if the top edge gets torn or thin. 8) Cut strips of paper tape long enough to span the diameter of the leg hole in the stump with a little extra to extend up the leg. Place the first strip across the middle of the opening and fold it at the corner to bend the tape upwards onto the thigh. You may want to cut a vertical notch down the center of the end of the tape, since you are folding it onto a curved edge, not a straight edge. This will allow the two halves of the end of the tape to cross each other, helping it to lie more flat around the curve. Add another strip of tape across the diameter of the opening, but perpendicular to the first strip, forming a cross that blocks the opening of the stump hole. Continue adding strips across the opening in a radial fashion until the stump is completely closed up. You might then want to place some long strips around the circumference of the thigh on top of all the radial strips' edges, to help seal the edges of those pieces of tape down.
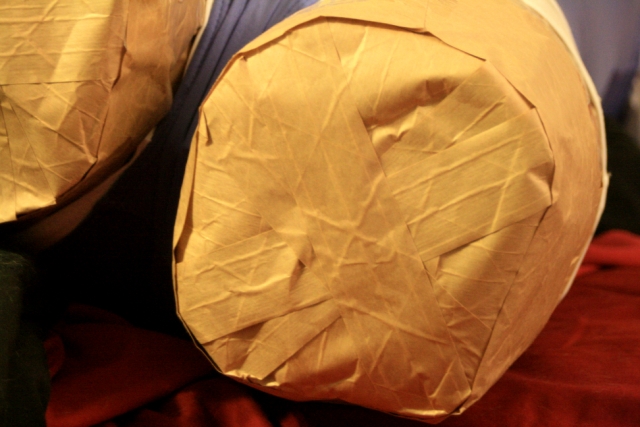
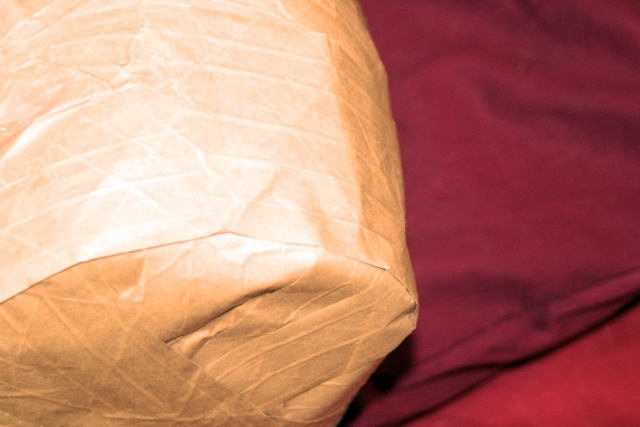
The finished dummy is very light, and a little fragile. I recommend filling the dummy with something to strengthen it, especially if you plan to try and fit spandex or tight, stretchy materials on the dummy. It will crack and break if you try to squeeze an empty, unreinforced dummy into a spandex leotard or underwear with a tight waistband, for instance. Expanding Insulation Foam DOES NOT WORK! Sure, the foam expands well, and it hardens nicely while still remaining lightweight, but I discovered something very disturbing when I tried it for the legs. After a few days, the foam will contract again, just a little bit. And, since the foam had, by this time, stuck itself to the inside of the dummy, the contracting foam then pulled the paper tape inside itself while contracting! It totally ruined the legs and I have to remake them. They're awfully creepy leaning against the wall all shriveled and distorted but still vaguely leg-shaped. I do NOT recommend using the expanding insulation foam. I recommend packing in crumpled up newspaper very tightly instead. UPDATE: Shortly after posting this, I discovered that the latex, when it bleeds through the fabric, could stick to the paper dummy and make it difficult to separate the costume from the dummy. So I came up with the idea to completely cover the dummy in clear plastic packaging tape. This worked marvelously! The latex now peels right off the surface, leaving it completely clean, and the packaging tape does double duty in reinforcing the paper tape and keeping all the edges and corners of the strips that perhaps weren't wet enough, down. So I recommend covering the dummy in clear packaging tape. I'll add pictures of the finished dummy when I have time. To make it really look like a finished, commercial product, you can cover your dummy in a soft t-shirt, pulled tight and pinned or sewn like the fabric covers on store-bought dummies. I happen to like the look of mine in its brown paper like a Victorian paper mache dummy, but you might prefer something softer or colored to match your decor. And that's the Paper Tape Dummy. Next up are the instructions for the Plaster Dummy! |
|
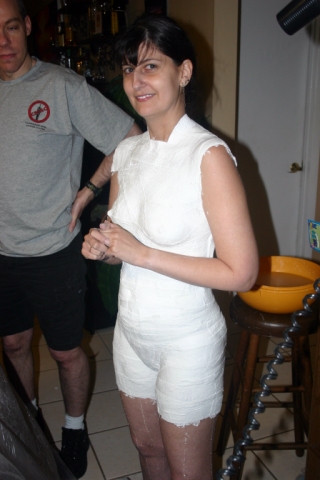
Plaster Dummy
This process goes pretty much the same as the Paper Tape dummy. Since I used the 8" roll of Rigid Wrap, I was able to cut long strips off the roll, then cut them lengthwise in half or thirds to make the appropriate strips. Then, carefully dunk them in the bowl of warm water (hold them stretched between your two hands so they don't fold down or crumple on themselves), and then place over the nude person in the same manner as the Paper Tape instructions.
I recommend wearing a pair of disposable underwear (the underwear will be fused to the plaster and will be cut off when the mold is cut off, so by "disposable", I mean something cheap that you don't mind destroying) to prevent the plaster from getting into delicate places. Many instructions also recommend wrapping the person in Saran Wrap so that the plaster will not stick to the skin and it will be easier to separate it from the person. I didn't do this the first time or this time, so it isn't necessary, but it will be much more comfortable for the person if you do. Whether you choose to use Saran Wrap or not, cover the body in lotion or vaseline, and if there is any noticeable body hair, it would behoove you to shave, or use the Saran Wrap, because it will hurt coming off.
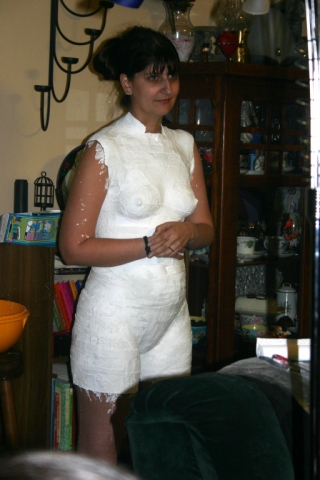
Start with the long strips under and above the breasts, then cross the heart, then add small pieces to curvy spots and longer pieces to flatter spots. The wet gauze will naturally conform to the contours of the body much more easily than the paper tape, and you will get a very accurate copy of all the dips and swells. Because of the nature of being covered in wet material, I quickly got cold, so my Plaster Dummy has pretty accurate erect nipples, unlike the Paper Tape Dummy, which does not have that level of detail even though I was still a bit chilly.
Next, you wait. And wait. And wait some more. It will take a long time for the plaster to dry enough to cut off the mold. I recommend using a hair dryer to help speed up the process. It still takes a really long time, but the heat from the hair dryer at least helped me to stop shivering.
As it begins to dry, you may notice thin areas ... places that have only one or two layers, that will need additional layers. The area around the ribcage will be particularly susceptible this because the act of breathing will cause the plaster to crack, or simply shift when it's still wet. So you may need to spot-patch the dummy as it dries.
When it's dry, the Plaster Dummy is cut off exactly as the Paper Tape dummy was. Don't forget the hash marks! If you make a flat-bottomed dummy, only a single cut straight up the back is necessary, but if you make your dummy with thigh stumps like I did, you will have to cut a straight line up both sides. Again, you can leave the crotch connected and just step out of it ... carefully.
The plaster will stick to the skin and peeling it off will feel much like peeling off a body-sized Band-Aid. In fact, separating the plaster from the skin will hurt so much, that when you slip the scissors between the body and the plaster to cut, it may be difficult to tell the difference between the separation of the plaster and actually cutting the skin. And then, of course, once the cuts have been made, you have to separate the plaster from large patches of skin without damaging the dummy. This is a very difficult, painful, and slow process, so you really have to make sure the whole thing is completely dry to minimize the potential damage.
The halves are put back together just like the Paper Tape Dummy (unfortunately, I don't have pictures of this process, but it's the same thing as before, so you can reference those pictures). Wet small tabs of gauze, line up the hash marks, and place the tabs over the seam at the bottom, the top, and spaced evenly between. Then take longer strips and place them vertically along the seam. Make that vertical seam two or three layers. Then do the same thing for the other side. If you really did let the plaster dry sufficiently before you cut it off, then even with the wet seams, it should be able to stand up on its own without the edges of the stumps bending or curving. Cover the openings of the stumps the same way you did with the Paper Tape Dummy, by placing strips of gauze radially around the bottom and folding the ends of the strips up over the sides of the thighs. Let this dry. If you plan to fill the dummy, whether you plan to remove the gauze and use the interior only (such as filling it with latex or silicone, that will hold its shape when the plaster is removed) or you plan to keep it as is and only use the filling as support, let the dummy dry overnight before filling. You might want to cover the armholes in the same manner as the thigh stumps if you plan to fill it. If you want to use the dummy as is, make sure you use several layers of Rigid Wrap, not just two or three. If necessary, you can always add more layers another day, after it has been cut off and put back together. When it is completely dry, at least a day after the final layer is added, you may want to paint, lacquer, or seal the plaster to keep it from chipping or causing plaster dust to rub off on your material. Pictures of the finished Plaster Dummy to come! I let it sit overnight in my storage room to dry and haven't been back to finish it yet, but I will post pics here when I do. |


The Inn Between © 2002