 |
 |
 |
 |


Follow The InnKeeper on:


Installing The Frame
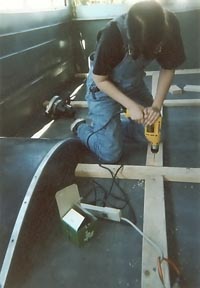
The "ribs" go width-wise across the bus while the "spine" goes length-wise down the center isle of the bus. I used 2x4's as the ribs and spaced them approximately 4 feet apart at the center, where I planned to rest the floorboards. I used 2 1/2" bolts. I can't remember what kind they are, but they were the only bolts that had a flat head which would screw down flush with the boards. This was so I could rest the floorboards flat on top of the ribs. First I had 2 people hold the 2x4 while I drilled a hole through the board and through the metal floor beneath. I dropped one of the bolts through the hole to make sure the board didn't move, then drilled 3 more holes down the length of the rib. Next, I or my partners went under the bus and screwed on the nut. Then the bolt was tightened and we moved on to the next one. The same technique was used on the spine. Pieces of 2x4 were cut to fit into each 4' section and bolted down to the center of the bus. 1 bolt each was used to hold down the support blocks, again, made out of 2x4.
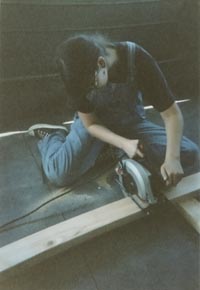
This is me first sawing the 2x4's to make the inner skeleton then drilling and screwing them into the floor of the bus. This internal skeleton serves as support for the bus, a frame to attach the inner skin (floor and walls) and any furnishings, such as the table and benches, the bed, the kitchen area, etc.
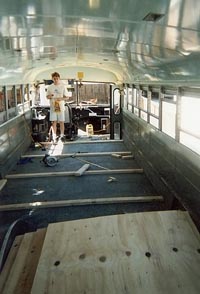
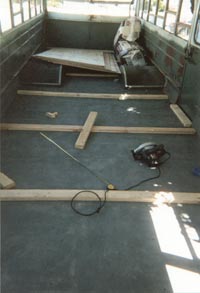
Here you can see the horizontal ribs of the skeleton.
The Inn Between © 2002